[Raspberry Pi] Đồng hồ để bàn Bulleyes!
Tại sao lại về Bulleyes?
- Không cần virtualenv để chạy Python
- Có vẻ (?) PiTFT tương thích tốt hơn
- Không cần xoay cảm ứng
- Độ phân giải tốt hơn
Mỗi tội là phải build driver cho USB Wifi TPLink WR725N
Phần cứng
- Raspberry Pi 2
- Màn PiTFT 2.8in cảm ứng điện trở 4 nút GPIO
- Thẻ nhớ 8GB
- Vỏ, chân, nguồn….
Phần mềm
Cài Raspbian
 Cài bản
 Legacy, 32-bit có kèm Desktop Environment
 Đặt username và password để dùng SSH
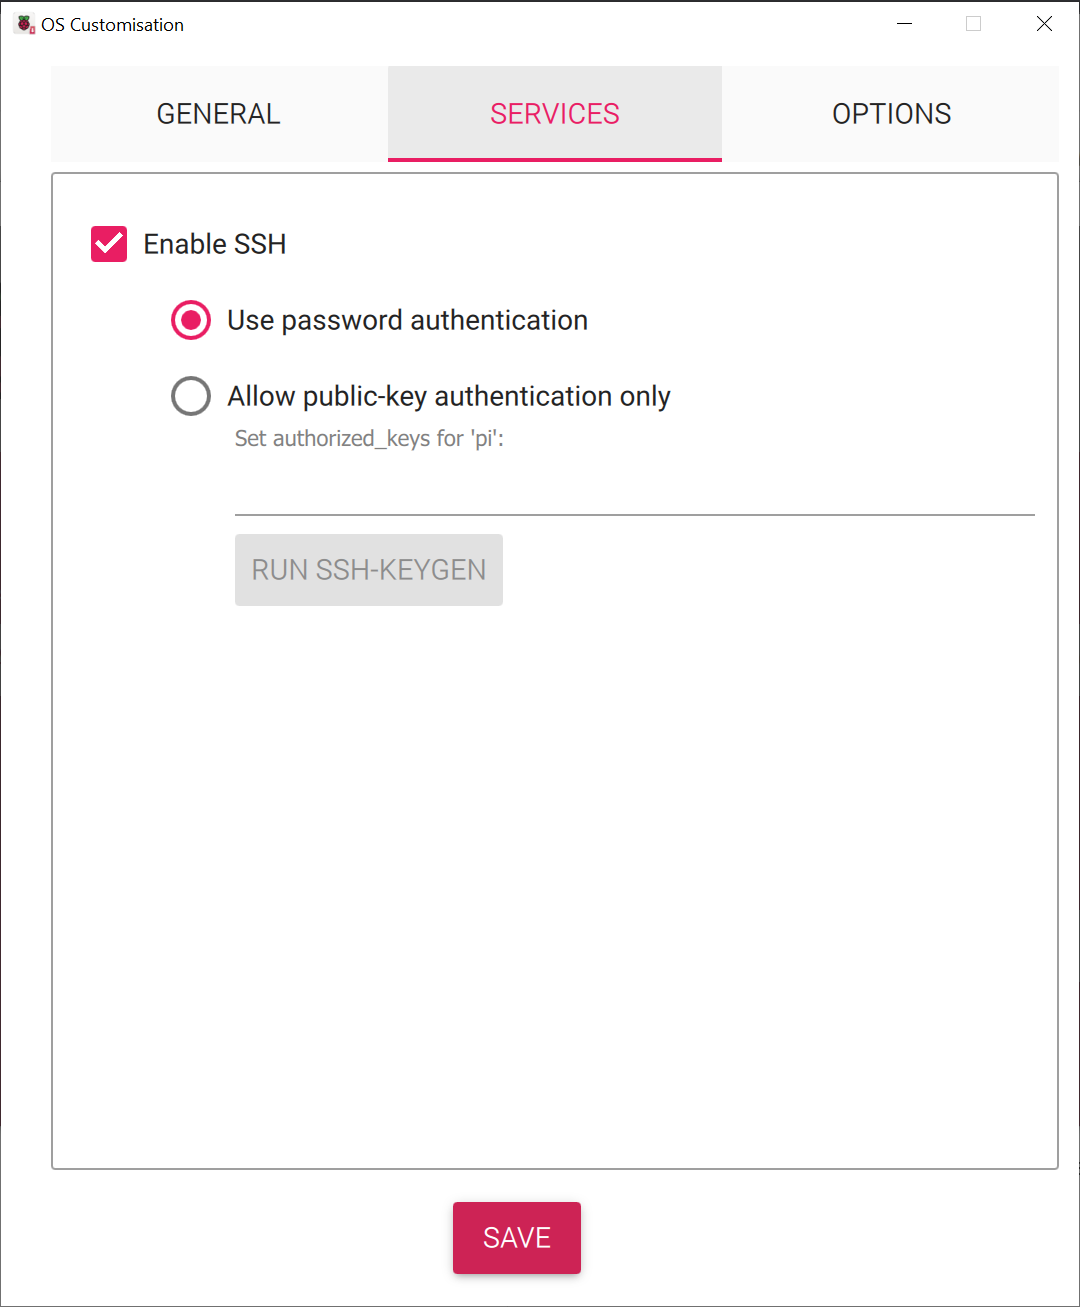 Bật SSH
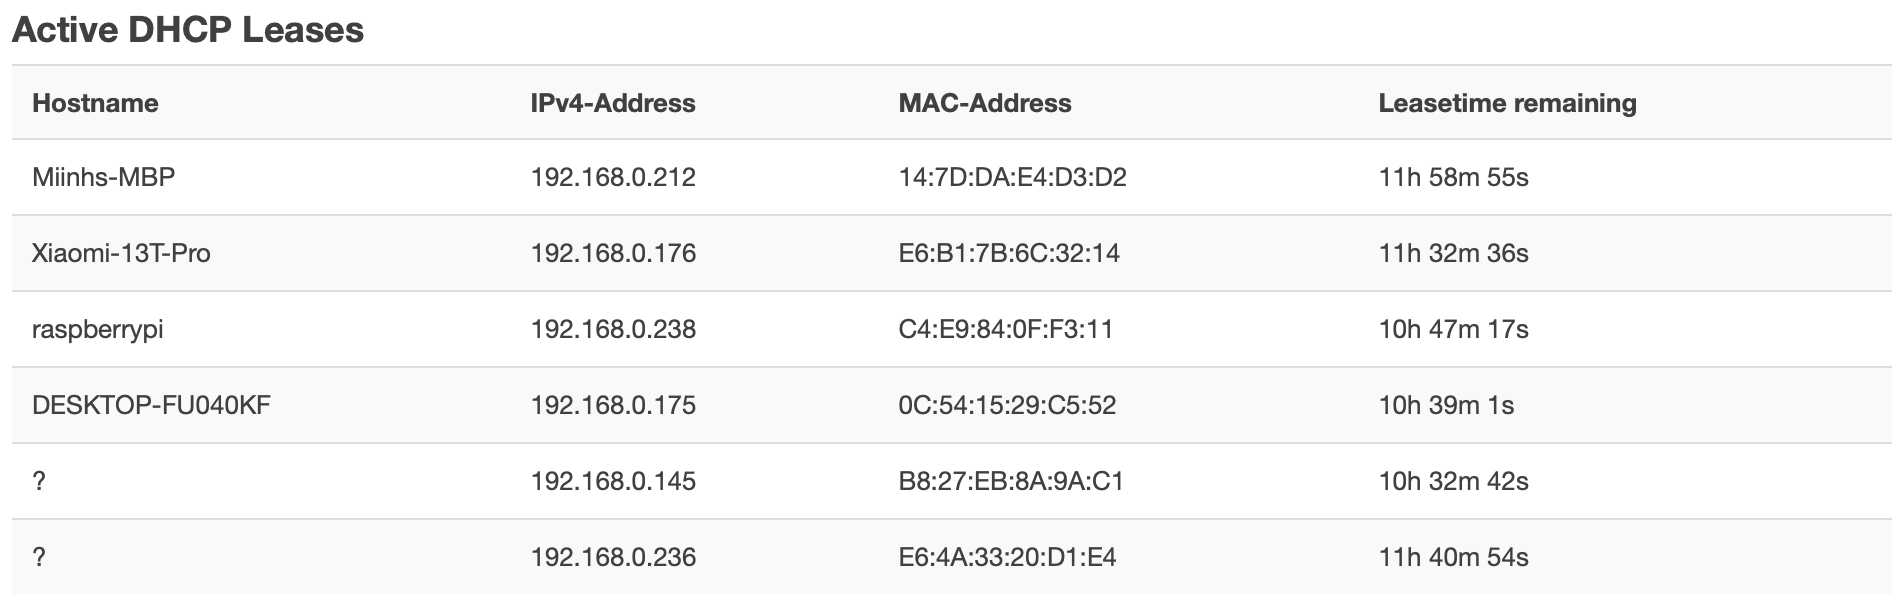 Cắm mạng, cắm nguồn, tìm IP của Raspberry Pi trong trang config router
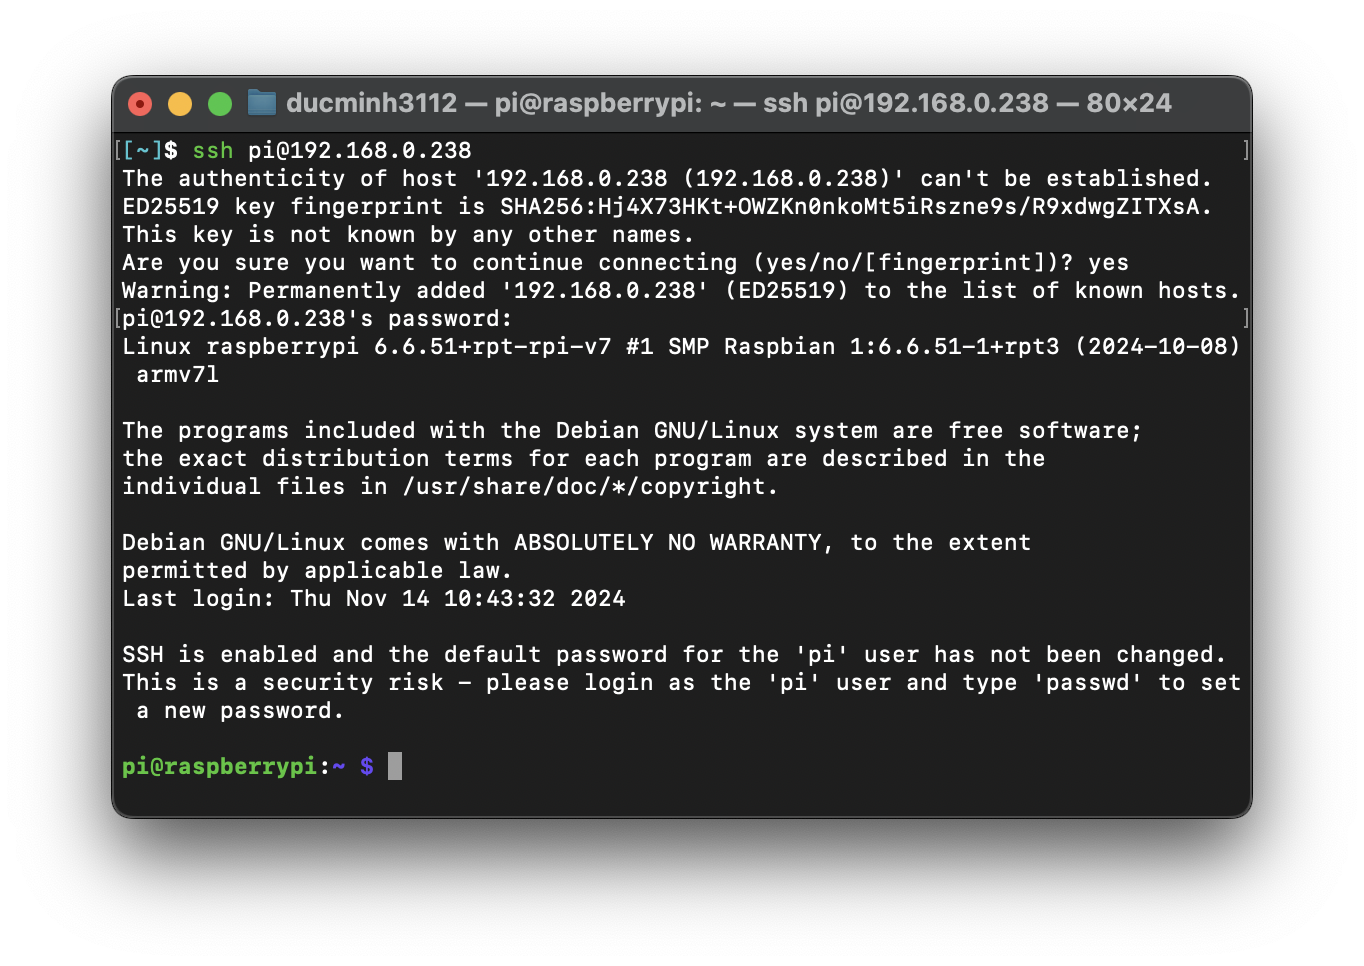 SSH vào
Cài PiTFT1
Tải script cài PiTFT
1
2
3
4
5
6
cd ~
sudo apt-get update
sudo apt-get install -y git python3-pip
pip3 install --upgrade adafruit-python-shell click
git clone https://github.com/adafruit/Raspberry-Pi-Installer-Scripts.git
cd Raspberry-Pi-Installer-Scripts
Cài PiTFT
1
sudo -E env PATH=$PATH python3 adafruit-pitft.py --display=28r --rotation=90 --install-type=mirror
Chú ý:
- Màn sử dụng là PiTFT 2.8in cảm ứng điện trở:
--display=28r- Góc hiển thị 90 độ:
--rotation=90- Chế độ hoạt động HDMI Mirror:
--install-type=mirror
Đối với các loại màn khác, xem thêm ở https://learn.adafruit.com/adafruit-pitft-28-inch-resistive-touchscreen-display-raspberry-pi/easy-install-2
Build driver USB Wifi TPLink WR725N2
KHÔNG cắm WR725N vào Pi2
Cài các gói yêu cầu
1
2
3
4
5
6
sudo apt-get update && sudo apt-get install -f
sudo apt-get dist-upgrade
sudo apt-get install -y build-essential git
sudo apt-get install -y linux-headers
sudo apt-get install -y raspberrypi-kernel-headers
sudo reboot
Build và cài driver
1
2
3
4
cd ~
git clone https://github.com/lwfinger/rtl8188eu.git`
cd rtl8188eu
make
1
2
sudo make install
sudo reboot
Tắt đi để cắm TPLink wr725n
1
sudo shutdown -h now`
Kiểm tra kết quả
1
lsusb
This should show something like BUS 00X .... REALTEK... RTL8188EUS... Wireless Network Adapter Great your wifi dongle is now recognised. If not, you probably don’t have this dongle or you need to repeat the above steps.
1
lsmod
Search for something like 8188eu ... 0
1
ifconfig -a
There should be quite some output next to and under wlan0, if there’s an IP address already visible, skip all next steps it’s working.
Setup wifi settings
1
sudo nano /etc/network/interfaces
Search for auto wlan0 at the start, if it’s not there, add it and keep the file open
Make sure it knows where to find the wpa config Add these lines to the bottom of the same file:
1
2
3
4
allow-hotplug wlan0
iface wlan0 inet dhcp
wpa-conf /etc/wpa_supplicant/wpa_supplicant.conf
iface default inet dhcp
1
sudo reboot now
Khởi động lại, dùng Desktop Environment để vào wifi
Cài MagicMirror²
Cài NodeJS 22
1
2
3
4
5
sudo apt-get install -y curl
curl -fsSL https://deb.nodesource.com/setup_22.x -o nodesource_setup.sh
sudo -E bash nodesource_setup.sh
sudo apt-get install -y nodejs
node -v
Cài MagicMirror²
1
2
3
4
5
cd ~
git clone https://github.com/MagicMirrorOrg/MagicMirror
cd MagicMirror/
npm run install-mm
cp config/config.js.sample config/config.js
Cài pm2
1
2
sudo npm install -g pm2
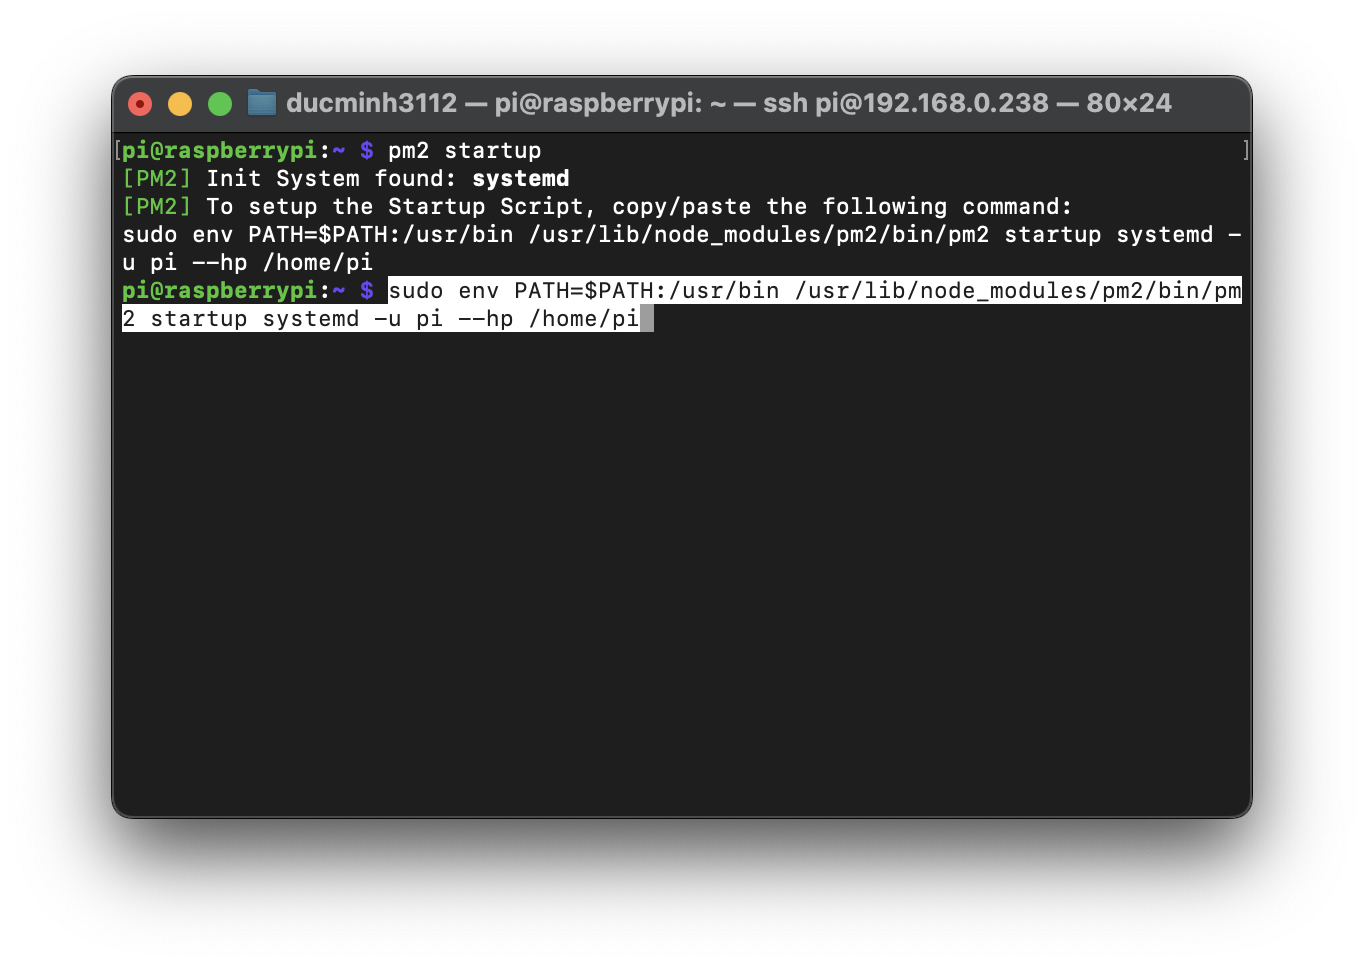
pm2 startup
 Chạy dòng lệnh
 pm2 đưa ra để hoàn tất cài đặt
Tạo script khởi động MagicMirror
1
2
cd ~
nano mm.sh
1
2
cd ./MagicMirror
DISPLAY=:0 npm start
1
chmod +x mm.sh
Khởi động MagicMirror cùng hệ thống với pm2
1
2
pm2 start mm.sh
pm2 save
Điều khiển MagicMirror với pm2
1
2
3
4
pm2 restart mm
pm2 stop mm
pm2 logs mm
pm2 show mm
Thiết lập MagicMirror²
Cài mmpm và mmpm web ui
1
2
3
cd ~
python3 -m pip install --upgrade mmpm
source ~/.bashrc
Khởi động lại sudo reboot now để bash nhận gói mmpm
Hoặc chạy lệnh echo 'export PATH="$PATH:$HOME/.local/bin"' >> ~/.bashrc && source ~/.bashrc
1
2
mmpm ui install -y
mmpm ui --url
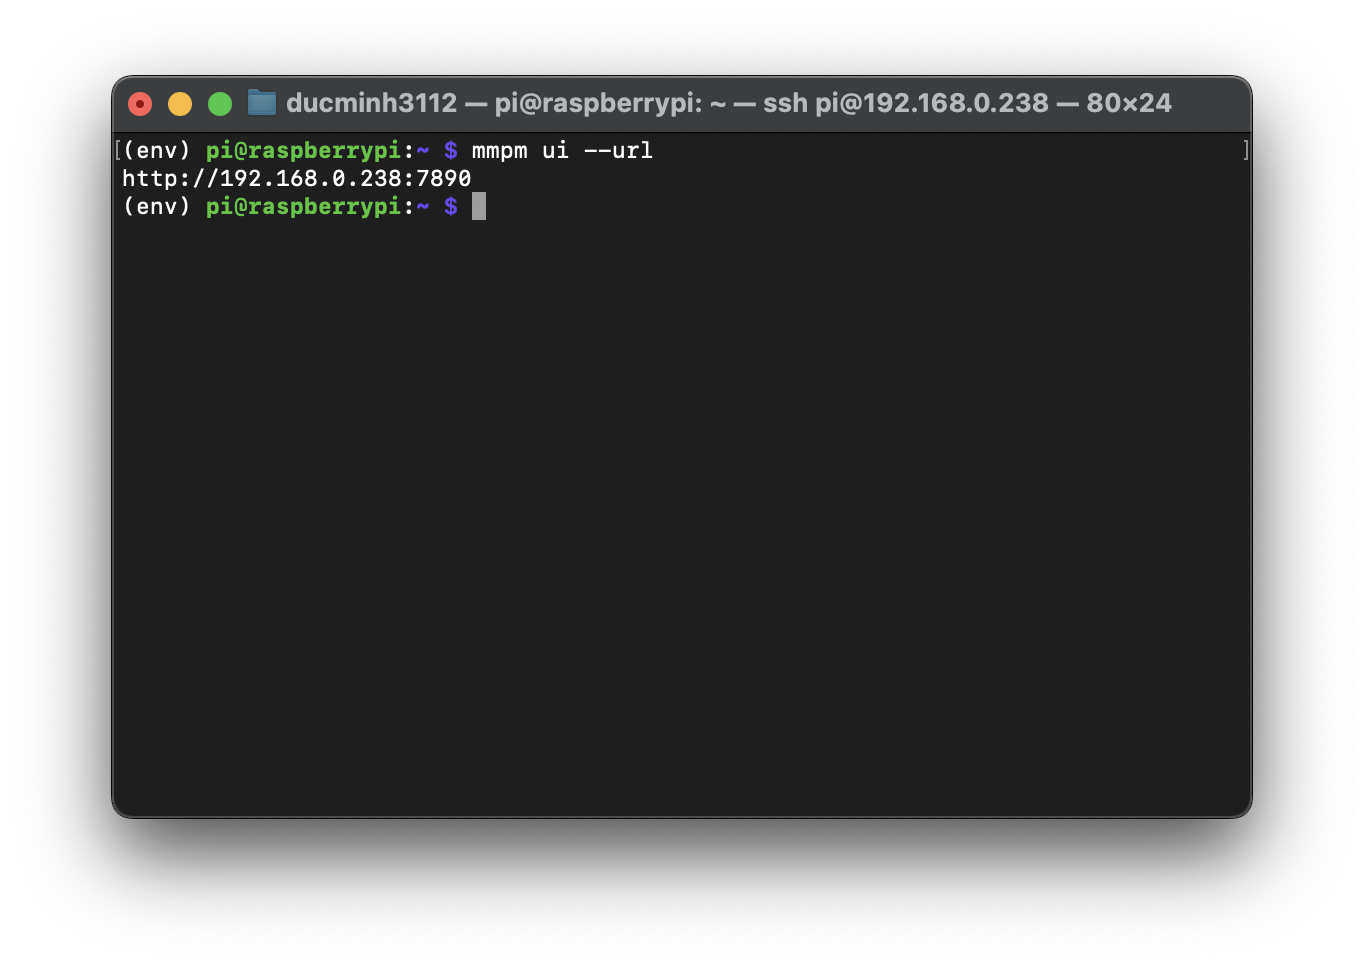 Địa chỉ WebUI
 mmpm
1
2
pm2 restart mm
pm2 save
Cài module khác
1
mmpm install -y MMM-Remote-Control
Thiết lập
1
2
3
4
5
6
7
8
9
10
11
12
13
14
15
16
17
18
19
20
21
22
23
24
25
26
27
28
29
30
31
32
33
34
35
36
37
38
39
40
41
42
43
44
45
46
47
48
49
50
51
52
53
54
55
56
57
58
59
60
61
62
63
64
65
66
67
68
69
70
71
72
73
74
75
76
77
78
79
80
81
82
83
84
85
86
87
/* Config Sample
 *
 * For more information on how you can configure this file
 * see https://docs.magicmirror.builders/configuration/introduction.html
 * and https://docs.magicmirror.builders/modules/configuration.html
 *
 * You can use environment variables using a `config.js.template` file instead of `config.js`
 * which will be converted to `config.js` while starting. For more information
 * see https://docs.magicmirror.builders/configuration/introduction.html#enviromnent-variables
 */
let config = {
	address: "0.0.0.0",	// Address to listen on, can be:
							// - "localhost", "127.0.0.1", "::1" to listen on loopback interface
							// - another specific IPv4/6 to listen on a specific interface
							// - "0.0.0.0", "::" to listen on any interface
							// Default, when address config is left out or empty, is "localhost"
	port: 8080,
	basePath: "/",	// The URL path where MagicMirror² is hosted. If you are using a Reverse proxy
									// you must set the sub path here. basePath must end with a /
	ipWhitelist: ["127.0.0.1", "192.168.0.0/24", "::ffff:127.0.0.1", "::1"],	// Set [] to allow all IP addresses
									// or add a specific IPv4 of 192.168.1.5 :
									// ["127.0.0.1", "::ffff:127.0.0.1", "::1", "::ffff:192.168.1.5"],
									// or IPv4 range of 192.168.3.0 --> 192.168.3.15 use CIDR format :
									// ["127.0.0.1", "::ffff:127.0.0.1", "::1", "::ffff:192.168.3.0/28"],

	useHttps: false,			// Support HTTPS or not, default "false" will use HTTP
	httpsPrivateKey: "",	// HTTPS private key path, only require when useHttps is true
	httpsCertificate: "",	// HTTPS Certificate path, only require when useHttps is true

	language: "en",
	locale: "en-US",
	logLevel: ["INFO", "LOG", "WARN", "ERROR"], // Add "DEBUG" for even more logging
	timeFormat: 24,
	units: "metric",

	modules: [
		{ module: "MMM-mmpm" },
		{
			module: "clock",
			position: "top_left",
			config: {
				dateFormat: "ddd, D MMM YYYY",
				displaySeconds: false,
			},
		},
		{
			module: "weather",
			position: "top_right",
			config: {
				weatherProvider: "openmeteo",
				type: "current",
				lon: 105.841171,
            	lat: 21.0245
			}
		},
		{
			module: "weather",
			position: "top_right",
			header: "Weather Forecast",
			config: {
				weatherProvider: "openmeteo",
				type: "forecast",
				lon: 105.841171,
            	lat: 21.0245,
				maxNumberOfDays: 3
			}
		},
		{
			module: 'MMM-Remote-Control',
			// uncomment the following line to show the URL of the remote control on the mirror
			// position: 'bottom_left',
			// you can hide this module afterwards from the remote control itself
			config: {
				customCommand: {},  // Optional, See "Using Custom Commands" below
				showModuleApiMenu: true, // Optional, Enable the Module Controls menu
				secureEndpoints: true, // Optional, See API/README.md
				// uncomment any of the lines below if you're gonna use it
				// customMenu: "custom_menu.json", // Optional, See "Custom Menu Items" below
				// apiKey: "", // Optional, See API/README.md for details
				// classes: {} // Optional, See "Custom Classes" below
			}
		},
	]
};

/*************** DO NOT EDIT THE LINE BELOW ***************/
if (typeof module !== "undefined") { module.exports = config; }
1
2
3
4
5
6
7
8
9
10
11
12
13
body {
    margin: 20px;
    position: absolute;
    height: calc(100% - 40px);
    width: calc(100% - 40px);
    background: #000;
    color: #aaa;
    font-family: "Roboto Condensed", sans-serif;
    font-weight: 400;
    font-size: 2em;
    line-height: 1.5em;
    -webkit-font-smoothing: antialiased;
}
Kết quả
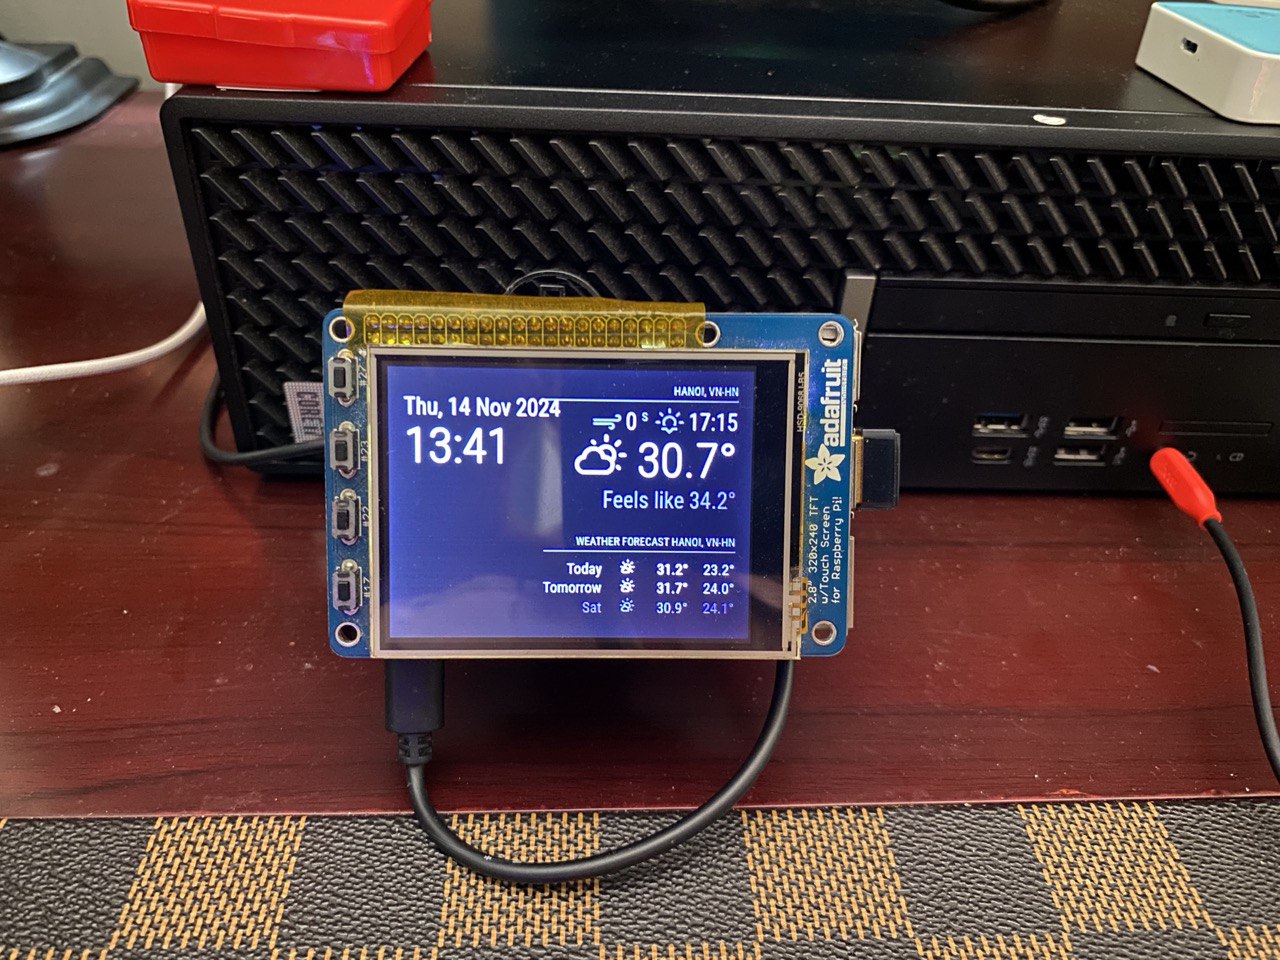 Kết quả